
Why an aquarium pump
A diaphragm aquarium pump normally makes bubbles. By reversing its pump heads, it sucks instead of blowing: you get a small, quiet vacuum pump built to run continuously, for about €20 second-hand.
Pros
- Price: €15 to €20 second-hand.
- Quiet: the diaphragm system is very quiet and reliable.
- Runs continuously: perfect for epoxy, which needs several hours of vacuum.
- Tiny, and it draws only a few watts.
Cons
- Limited vacuum, about -0.2 bar.
- No margin: the pump runs flat out, the smallest leak stops it from reaching the vacuum.
- Slow start: about 30 minutes to empty a 2.5 × 1.2 m bag. A vacuum cleaner at the start solves it (see below), and a slow hardener leaves time.
To vacuum-bag the lamination of an EPS board, it is a very good option: -0.2 bar is exactly what the pump reaches in normal use. No risk of crushing the blank with too much vacuum, and a steady vacuum for the whole epoxy cure. The technique is not new: model aircraft builders have long used it for EPS-core wings; a board just has a larger volume.
The pump’s power does not change the result: a professional pump only reaches the vacuum value faster thanks to its flow. Once there, the vacuum is the same, and it holds over time.
Choosing the pump
You need a diaphragm pump that is easy to take apart for the reversal. Both tested models have an original flow of about 350 to 380 L/h, which seems the minimum to reach -0.2 bar.
| Pump | Original flow | Vacuum reached | Price |
|---|---|---|---|
| Newa NW33 (recommended) | 2 × 190 L/h (twin outlet) | a little over -0.2 bar | ≈ €15 second-hand |
| Schego M2K3 | 350 L/h | ≈ -0.18 bar (5 inHg) | under €20 second-hand, €40 to €50 new |
- Newa NW33: more powerful than the Schego, twin outlet (you will need a 2-into-1 connector). The adjustment knobs stay fully open. Beware of the NW22, which looks the same but is not powerful enough.
- Schego M2K3: very sturdy, quiet and easy to open; diaphragms and pump heads are sold separately (about €10 a pair) to refurbish it. Check the exact model (not a weaker version) and, second-hand, take it with its air hose, handy for the connection.
- Other models: other diaphragm pumps, more powerful (400 L/h and up), may do as well or better. If you test one, let me know to complete this guide.
The fittings
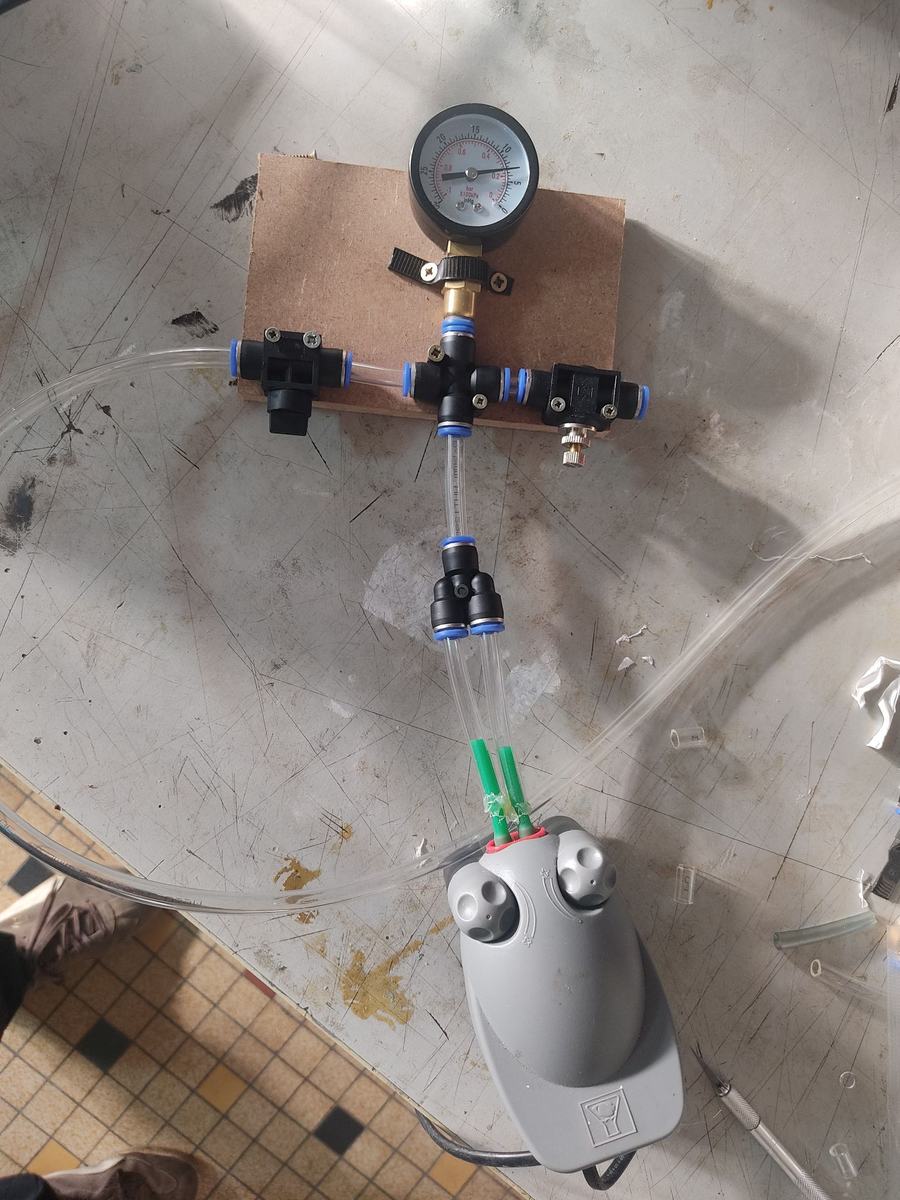
At its simplest, you can plug the reversed pump straight into the bag with a plain PVC hose: it works, with no risk of too much vacuum since the pump is limited. The fittings below let you monitor the vacuum, find leaks and switch suction source along the way (aquarium pump, fridge compressor, vacuum cleaner…). Fitting quality is key: hunt down every leak.
| Part | Good to know | Indicative price |
|---|---|---|
| Vacuum gauge | Dial with negative values (bar, mbar or inHg), usually a ¼ thread. Seal the thread with silicone tape. | under €5 |
| Flexible PVC hose 8 × 5 mm | Compressor / pneumatic hose, clear or coloured. Take at least 5 m. | ≈ €1 per metre |
| Push-in fittings for 8 mm hose | ¼ fitting for the gauge (straight or elbow); 2-into-1 for the NW33; tee (or 4-way); on/off valve. | a few euros each |
| Bag connector | Aluminium through-bag fitting, sealed and detachable. Choose the barb to fit your hose. | €30 to €40 |
- Vacuum gauge: almost essential to check the pump and the vacuum. Here it sits at the head of the circuit, for simplicity. Experienced builders advise placing it on the bag for a more realistic reading; but that is one more leak point and not easy with a board in the bag. At the head of the circuit, the reading stays reliable if there is no leak between it and the bag.
- Tee or 4-way: with a tee, the pump, the gauge and the bag each take one port. With a 4-way, you add the valve.
- On/off valve (respect the flow direction marked on it): it closes the circuit without unplugging the bag, gives a second inlet to plug a vacuum cleaner at the start, and lets you test for leaks: vacuum reached, close and open the valve; if the gauge needle moves, there is a leak.
- Bleed screw: a fitting with a fine screw to create an adjustable leak. Not very useful in the end, since the pump always runs flat out: prefer a second on/off valve.
- Bag connector: the biggest expense, and no cheaper from China. There are 3D-printable designs (example on Thingiverse, another example) or homemade ones from old bolts (video, not tested).
To fit a push-in connector, cut the hose perfectly square with a craft knife without crushing it and push it in: the collet locks it. You can release it by pressing the collar, but avoid doing it often, it marks the hose and can leak. Check that every fitting matches your hose diameter.
Reversing the pump
This is the technical part, but it is simple. The rubber diaphragms move back and forth quickly, like a suction cup, drawing air in and pushing it out. Just reverse the pump heads (fitted with valves) to reverse the direction: the pump sucks.
Schego pump, step by step
- Remove the clear cover (4 screws, underneath) and the adjustment screw at the back.
- With the cover off, first unscrew the nut holding the diaphragm, then the two screws of the blade. Do the same on the other side.
- Remove both metal blades, then gently unhook the rubber diaphragms from their seat (the pump head).
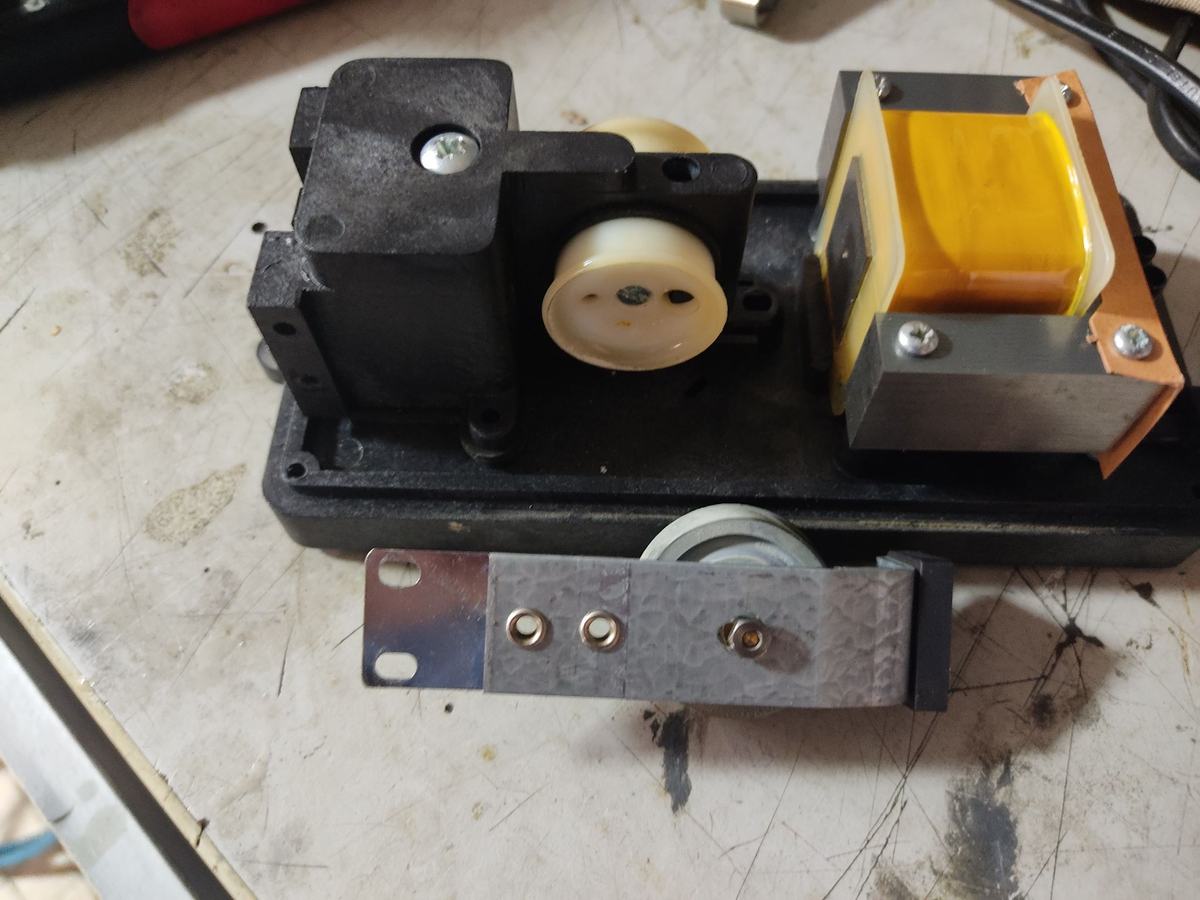
Blade removed, diaphragm unhooked. - Mark the direction of the pump heads, unscrew the through-bolt and pull them out.
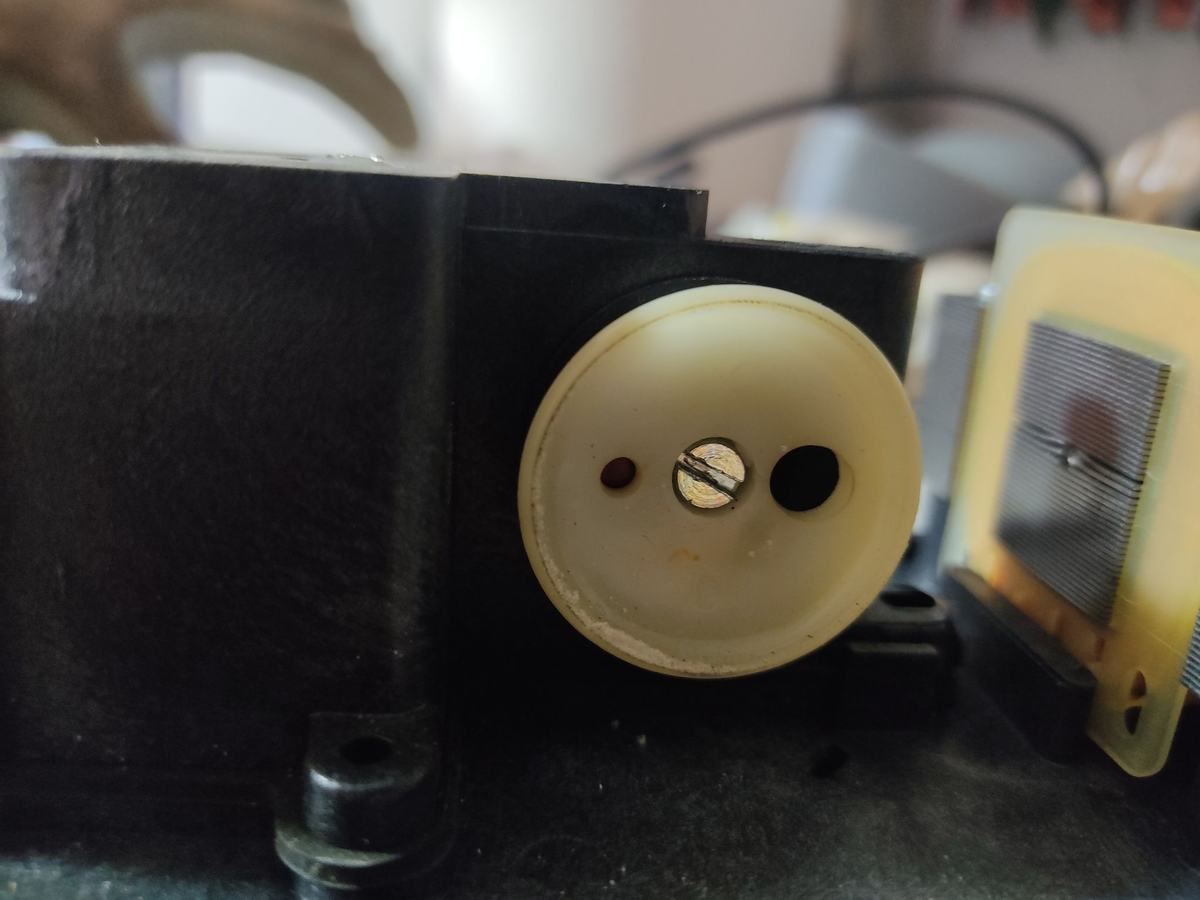
The pump head and its bolt. 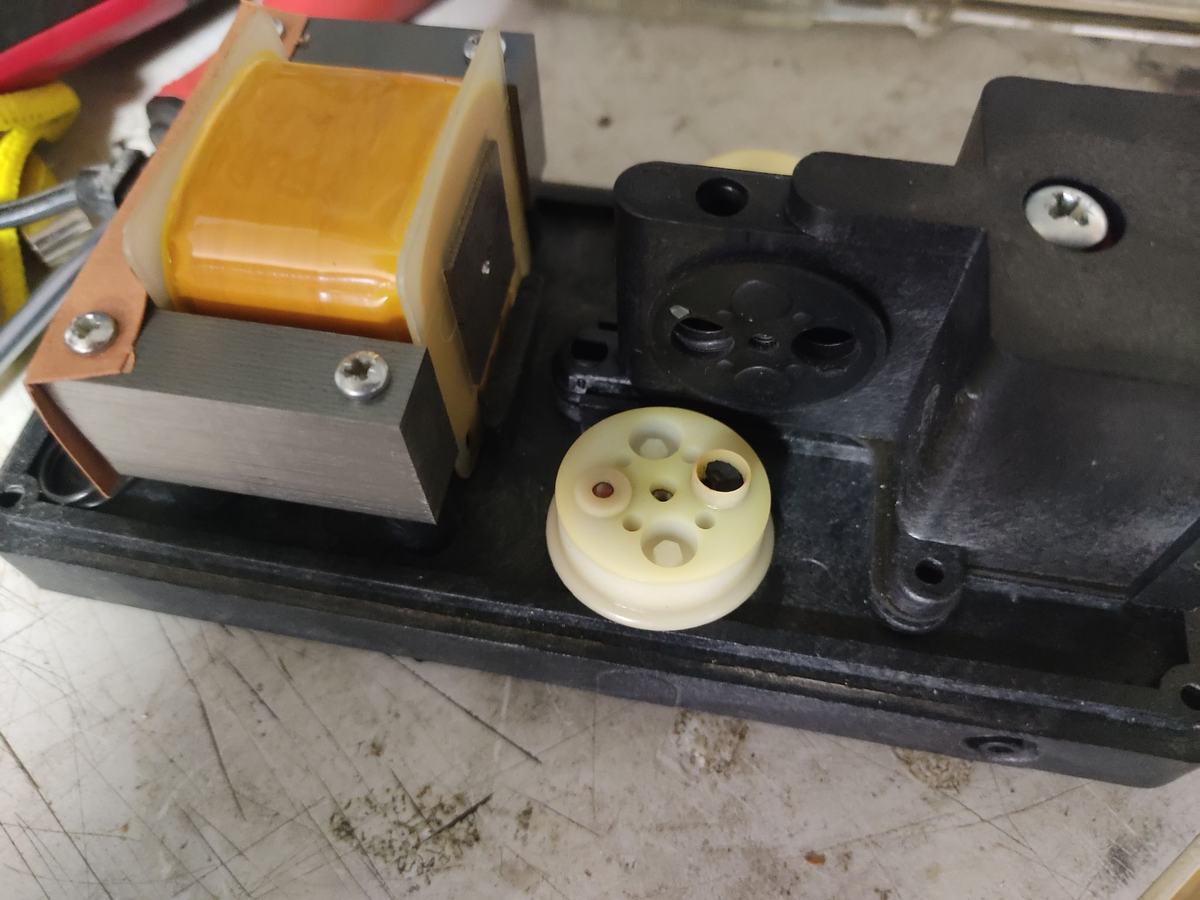
Pump head out. - Turn the pump heads round, on both sides. Check they sit perfectly in their seat, without leaks, like the diaphragms (clean them before refitting).
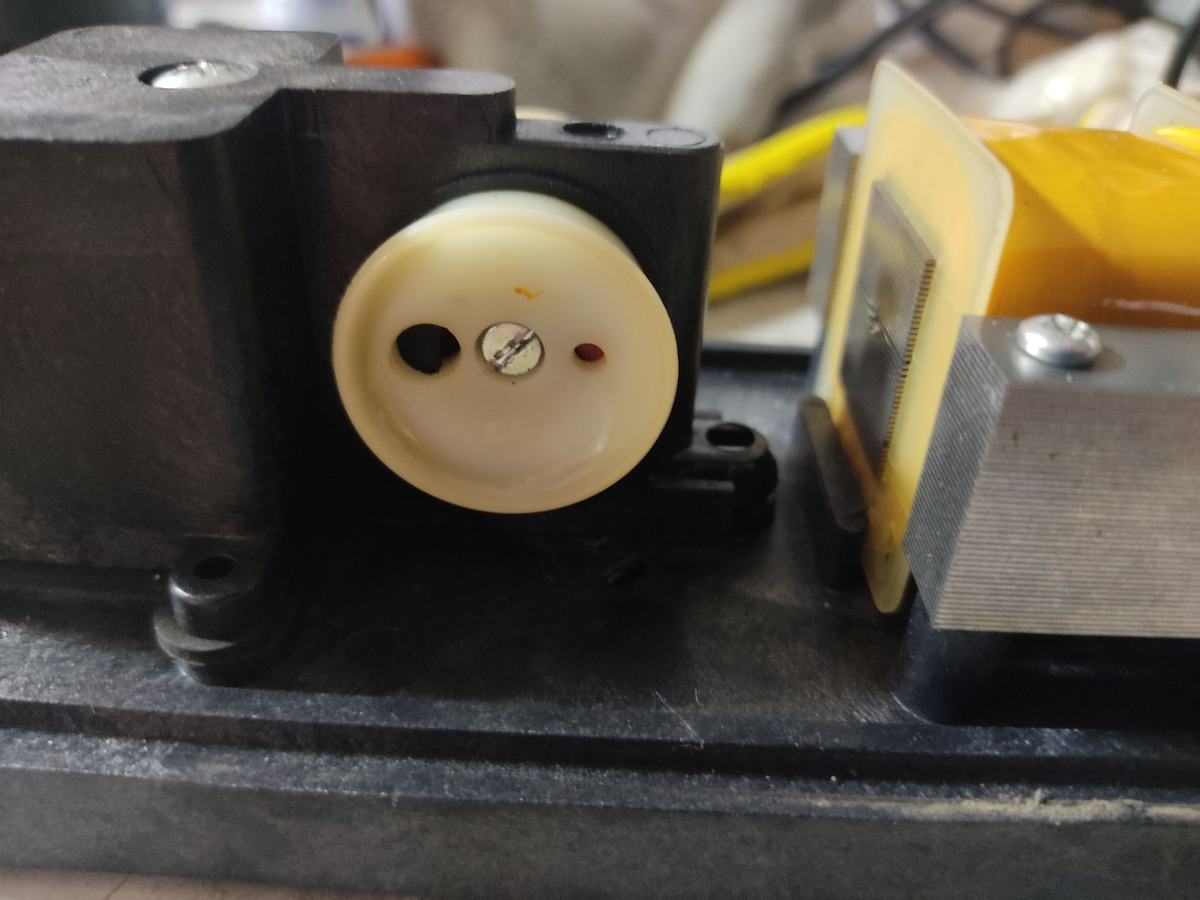
Pump head reversed. - Refit the blades (2 screws). Set the gap to the electromagnet as small as possible, without the blade touching it in motion: 0.5 mm with feeler gauges. Wider, the pump loses efficiency.
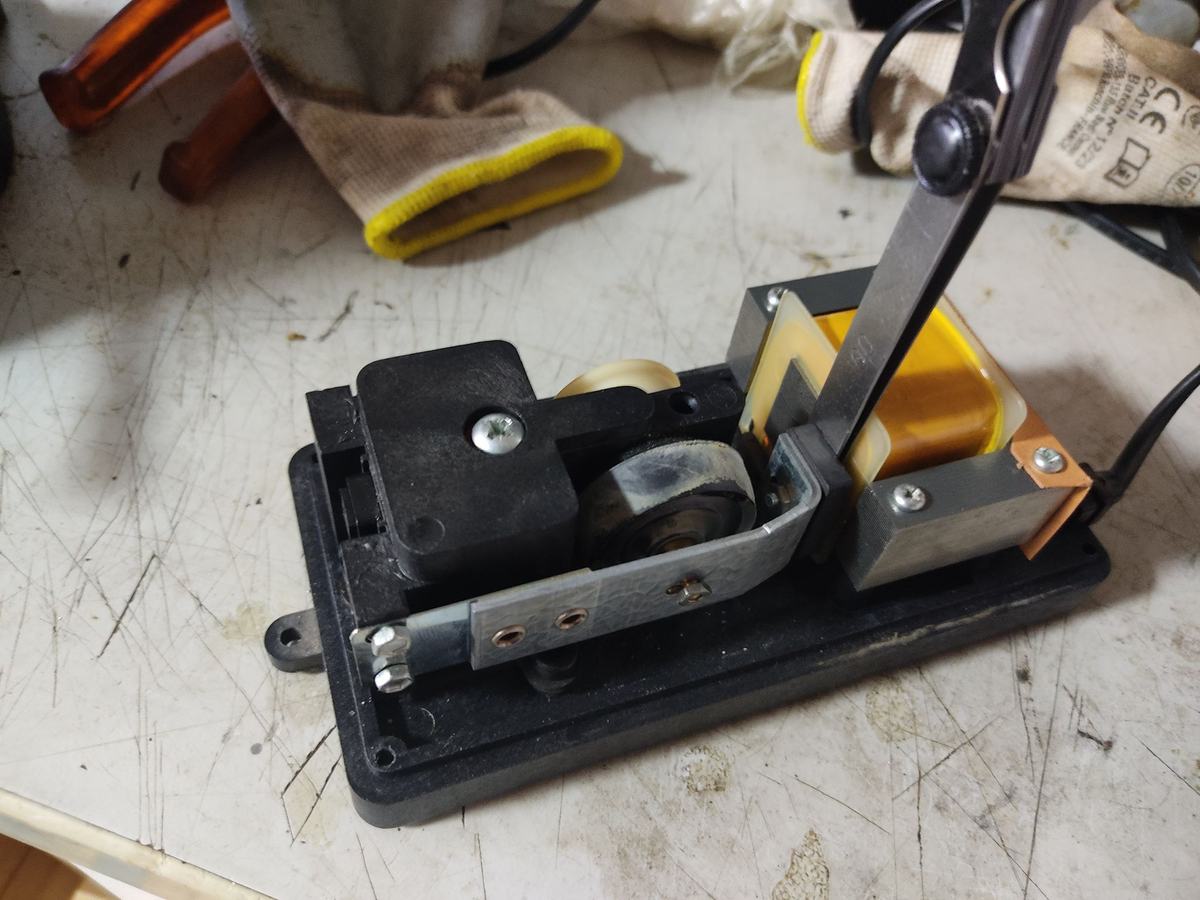
Blade / electromagnet gap set with feeler gauges. - Reassemble the pump.
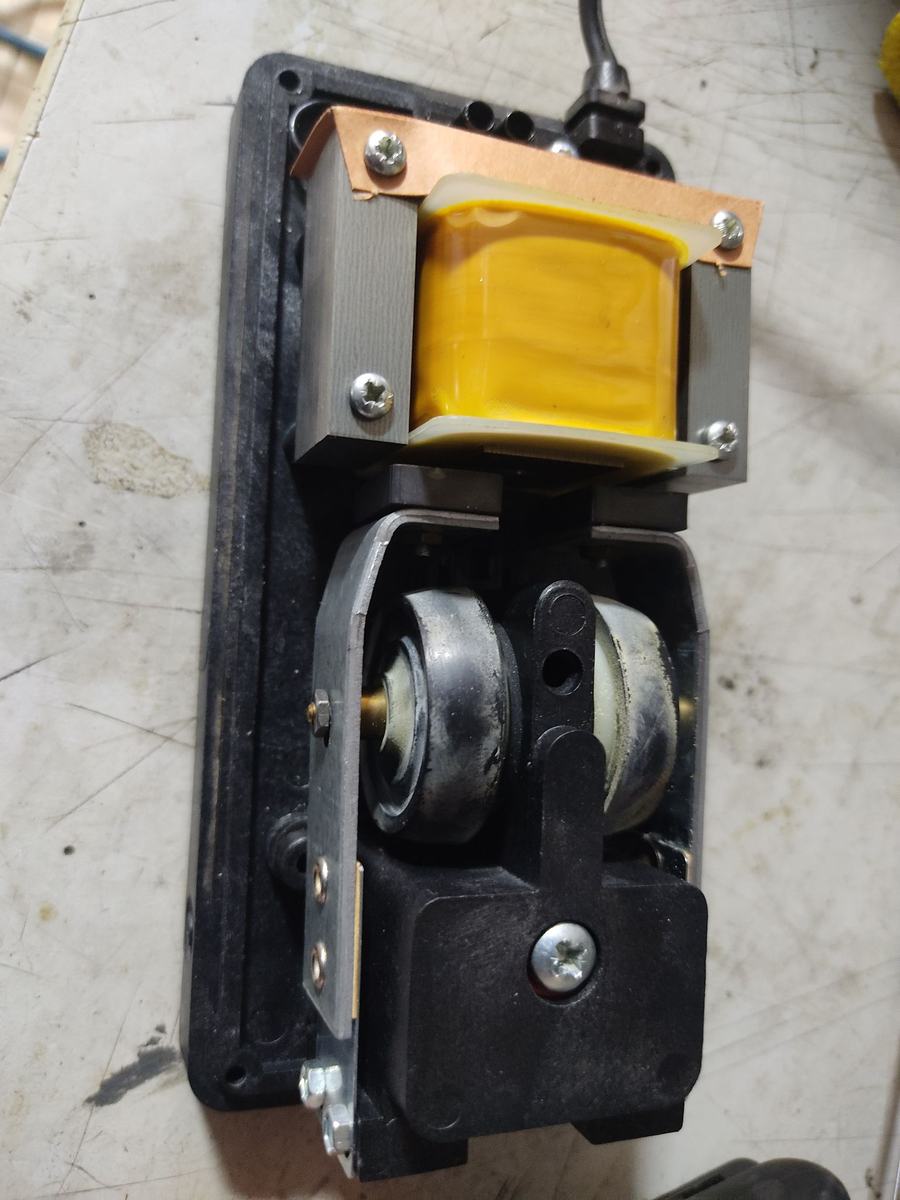
Pump reassembled. - The original adjustment screw at the back: remove it and seal its hole with good tape (cover off, where the screw goes).
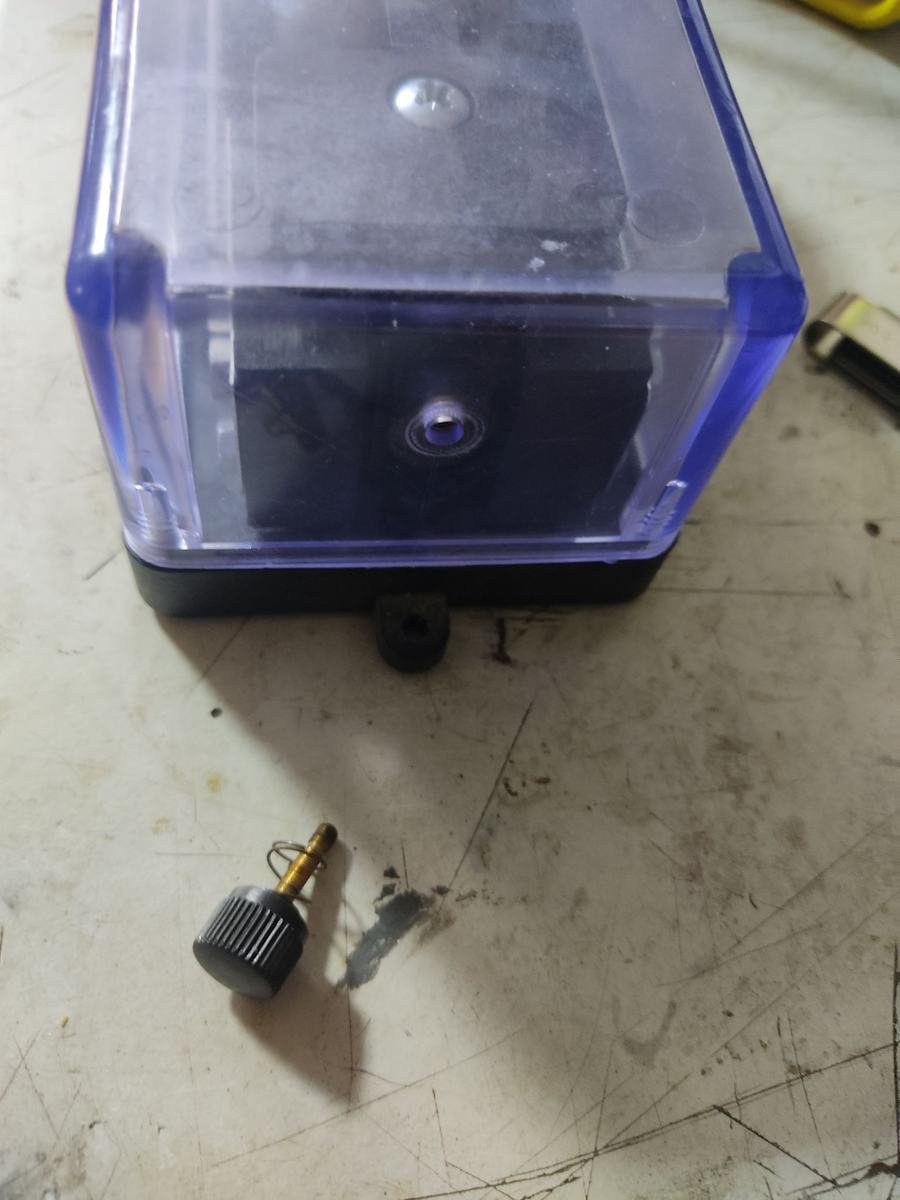
The adjustment screw removed. - To connect the pump to the PVC hose, a thinner hose (the one supplied with the Schego) fits perfectly into the slightly warmed PVC hose; secure the joint with hot glue.
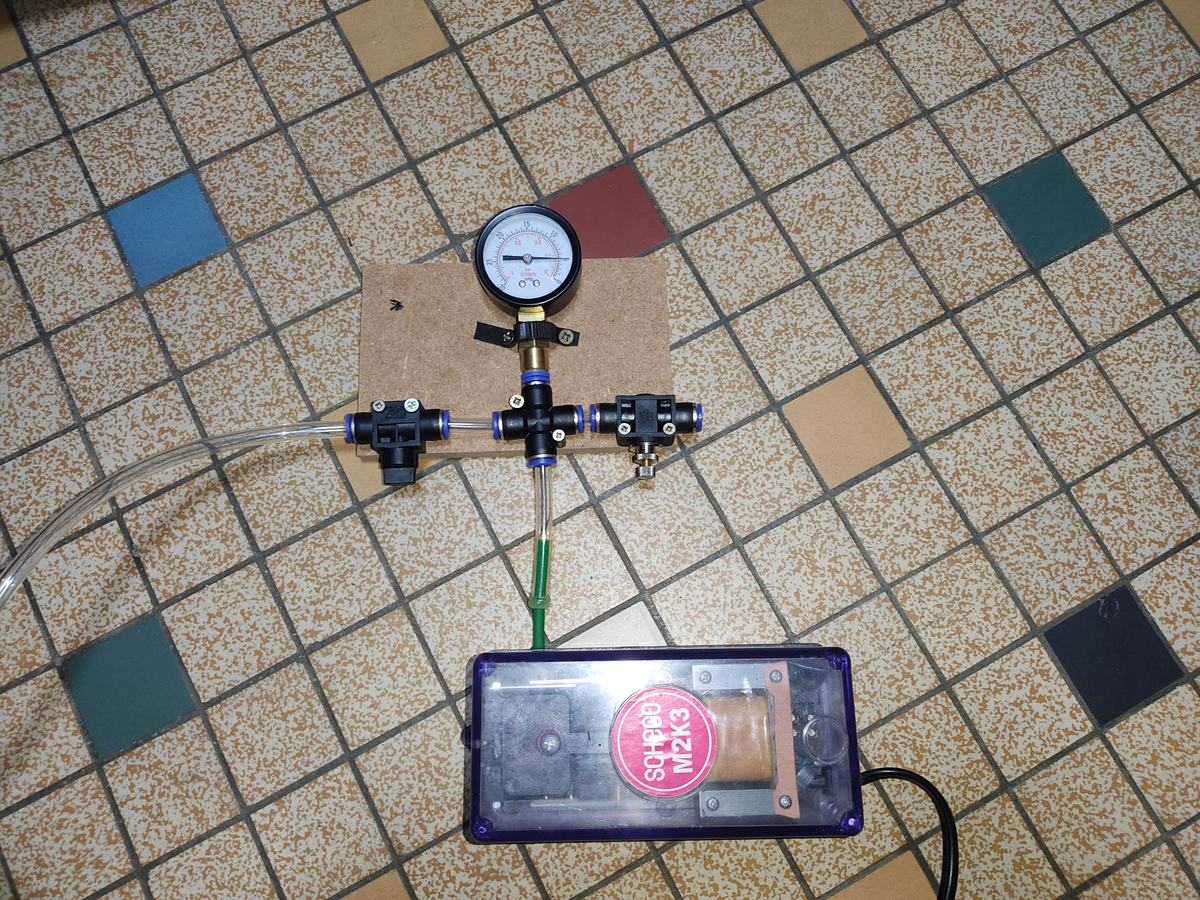
The Schego connected to the circuit.
Plug the pump back in and check the vacuum on the gauge: about -0.18 bar (5 inHg) with the Schego. If the vacuum is too weak, go back over the build: leaks at the pump heads, diaphragms very lightly greased on their contact faces, blade gap to the electromagnet.
NW33 pump and other models
The NW33 is modified the same simple way: video of the modification. For other models (not tested), these videos explain the common principle: making a vacuum pump from an aquarium pump, another test (in French).
The bag and how to close it
The bag must be airtight: the pump runs flat out, and the smallest leak makes the vacuum drop.
- The bag: professional vacuum-bagging film, as a tube, so only two ends need closing. Not too wide (1.20 m at most, 1 m is good) nor too long, so you do not empty an extra metre at each end: 2.5 × 1.2 m for a 6′1 (185 cm) board. A film that is too thick, not made for this, forms big creases that mark the lamination.
- One end with sealant tape: laid flat, the film folded over several times and taped, it does not leak. But sealant means cutting the bag to open it (it gets shorter each time) and buying more.
- The other end with two tubes (Jérôme Dubois’s idea): removable, reusable at will, for under €5. Two electrical conduit tubes from a DIY store, 16 and 20 mm in diameter, cut a little longer than the bag width (135 cm for a 125 cm bag).
- Tape the 20 mm tube to the bench and draw a perfectly straight line along its middle, full length: without a straight line, the closure will not slide.
- Slit the tube along the line with a fine saw, slightly tilted so you only cut one wall.
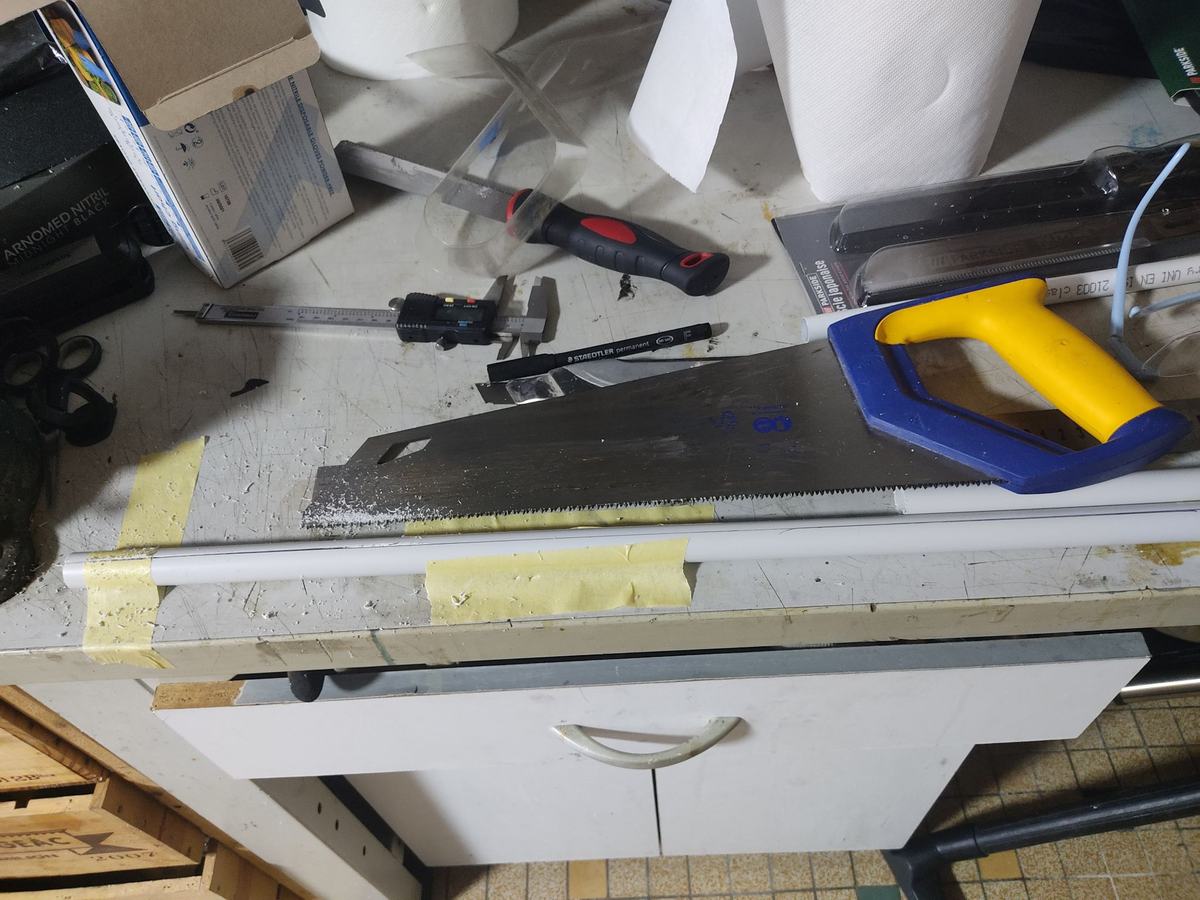
The 20 mm tube slit with a fine saw. - Sand the slit well to widen it (2 to 3 mm of play) and smooth the edges, and round the corners at the ends so they do not tear the bag. The 16 mm tube must slide perfectly inside the 20 mm one.
- Wrap the bag once around the 16 mm tube, then close it by sliding the 20 mm tube over. Do not force: smooth and stretch the film as you go. If it jams near the end, there is extra thickness (and a leak risk): go back and stretch again, without any crease. The vacuum then presses the film onto the tube.
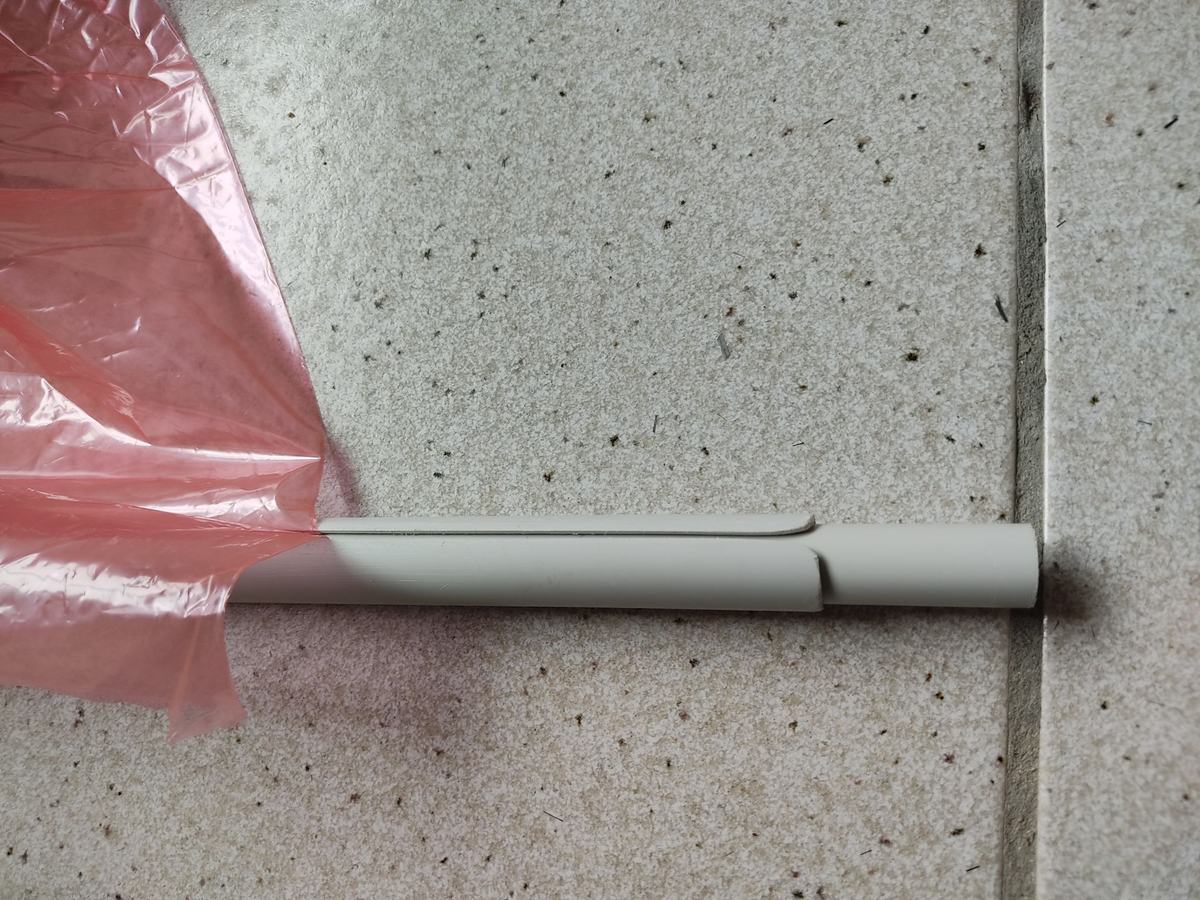
The bag closed by the two tubes.
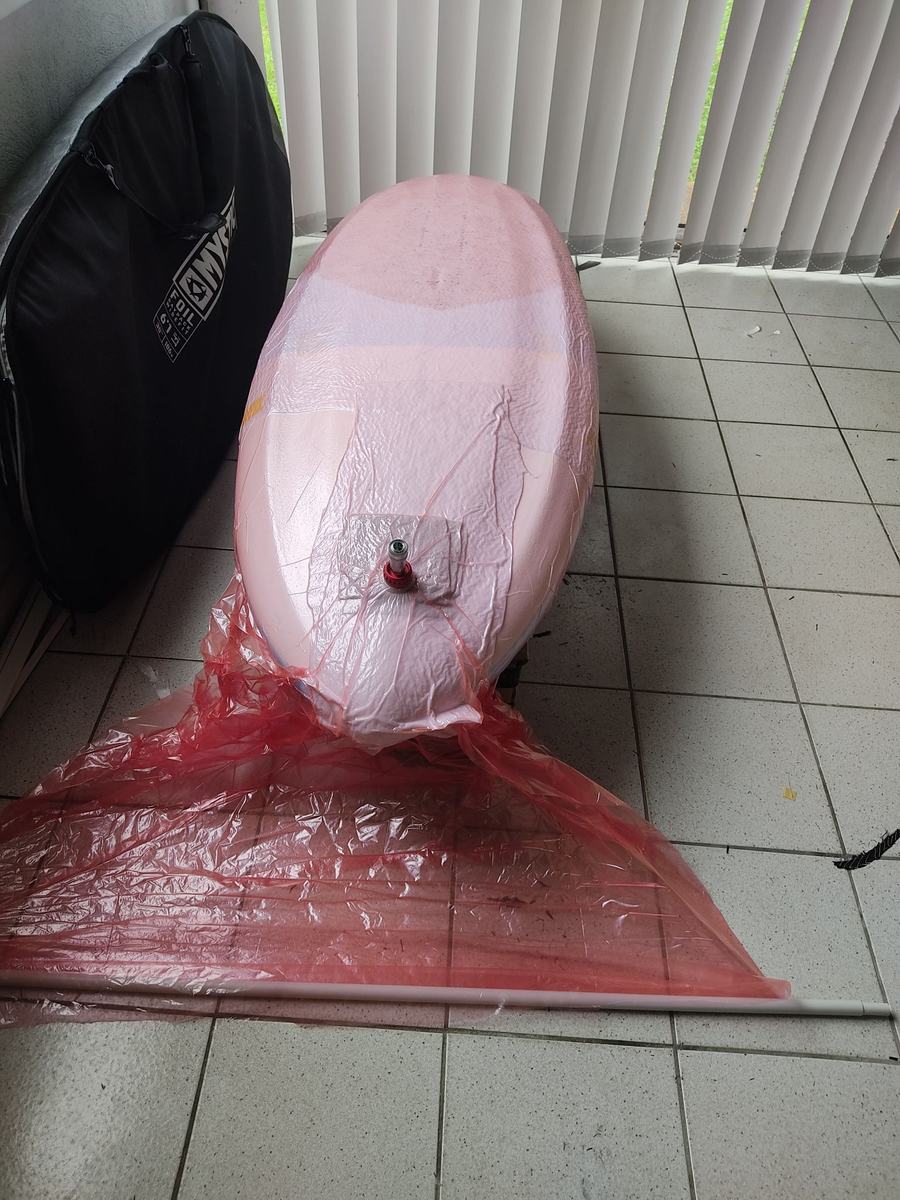
Bagging
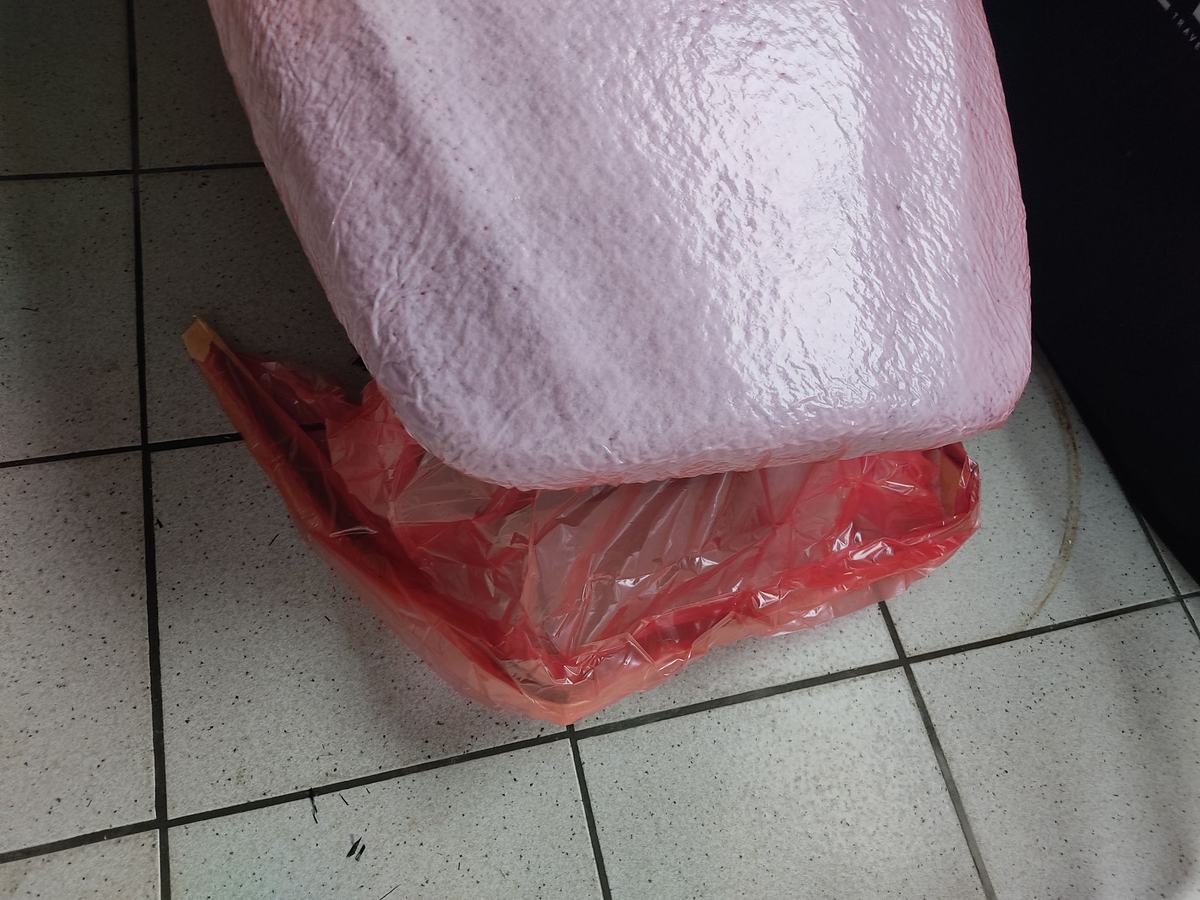
With the pump alone, allow at least 30 minutes to empty the bag of a wingfoil board: a bit long, and awkward depending on your resin. The answer: start with a household vacuum cleaner, plugged into the circuit’s second inlet. In under 5 minutes, the bag is empty. The vacuum cleaner connection can be rough (a reducer and a piece of hose): even if it leaks a little, its power is enough.
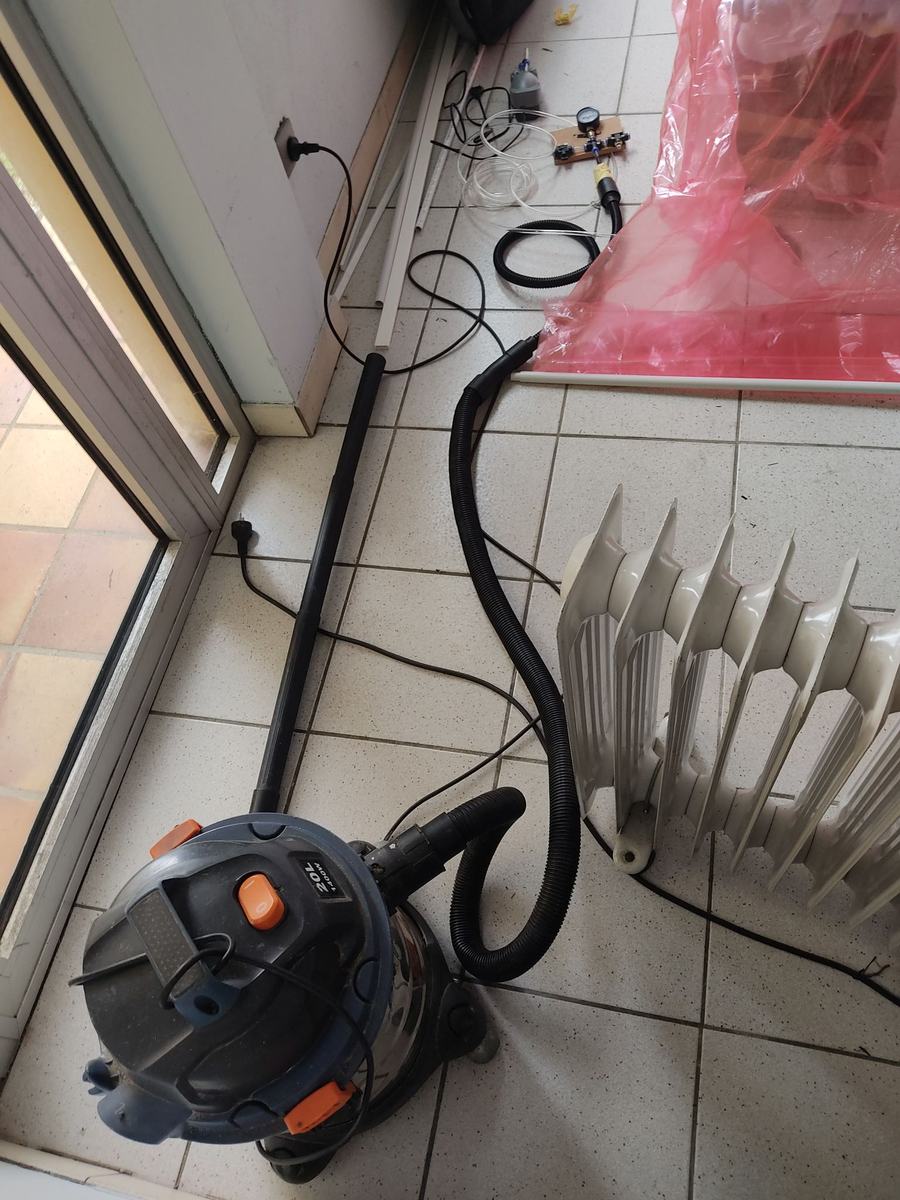
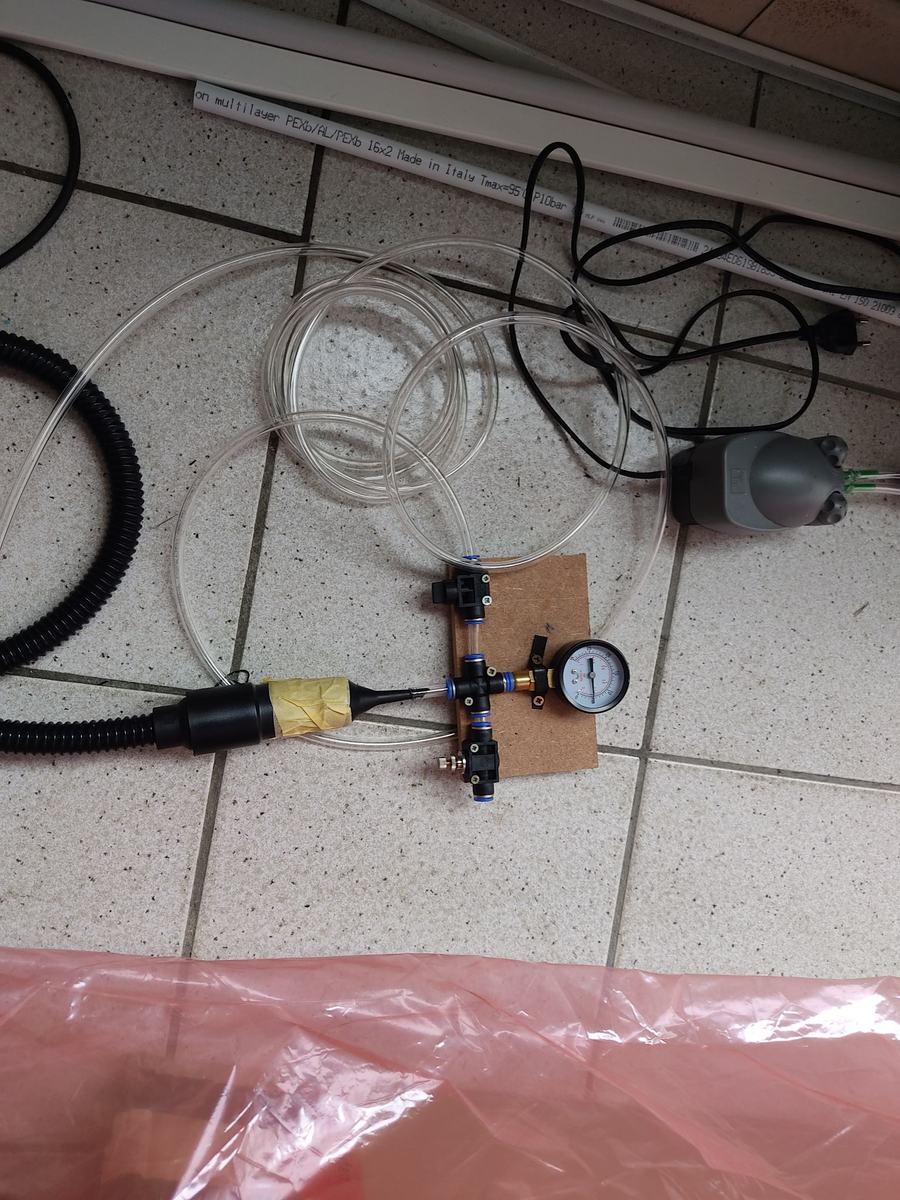
- Bag emptied with the vacuum cleaner, close the valve, then connect the aquarium pump with the push-in fittings.
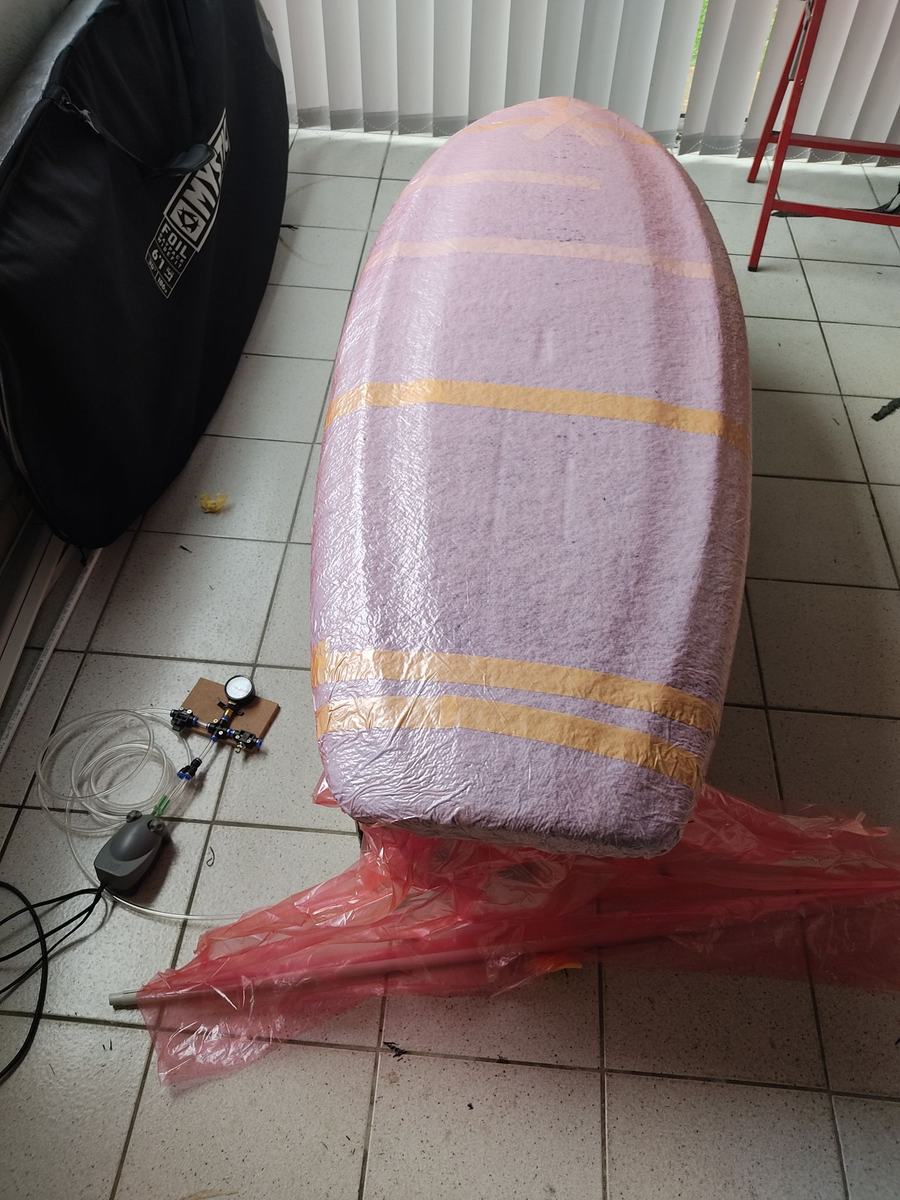
- Let it run for your epoxy’s cure time: usually about ten hours with a slow hardener at 25 °C (follow your resin’s data sheet).
- To check for leaks, close and open the valve: the gauge needle, around -0.2 bar, should hardly move.
Summary
- The NW33 is recommended: the Schego, though bigger, turned out a little less powerful (internal leaks are possible, to be checked again).
- Both are perfect to vacuum-bag an epoxy lamination on an EPS core: reliable, quiet and cheap.
- A second-hand fridge compressor (often free) has more drawbacks for this use, but is worth it for a deeper vacuum. The fittings and the gauge stay the same: you choose the source (aquarium pump, fridge compressor, vacuum cleaner…) as needed.
- Simplest and cheapest: the modified pump plugged straight into the bag, with no fittings, making sure there is no leak. It works too, for the price of the second-hand pump alone.
In the calculator, the “Vacuum pump” line points to this option when you choose vacuum bagging.
Open the calculator →